


Table of contents


No headings in the article.
EC2 instance is a virtual server (you can also think of it as a virtual machine) where you can run web applications on the AWS platform.
Following are the steps to create an EC2 instance
Login to AWS cloud aws.amazon.com.
After logging in you would see the following screen.

Click on the EC2 button which would navigate you to the EC2 dashboard

Click on the Launch Instance dialog box.

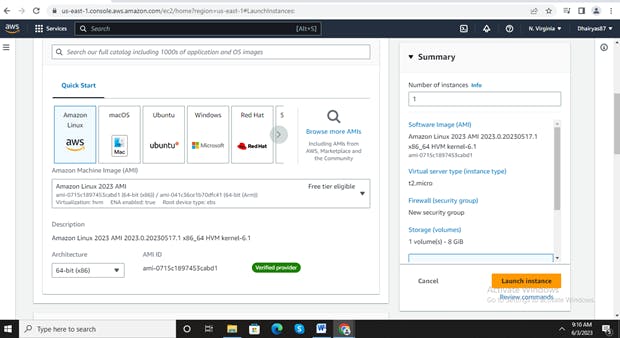
Choose your preferred Amazon Machine Image. you can think of Amazon Machine as a combination of OS, Storage for root devices along with architecture that you want for your virtual server. We will choose Amazon Linux 2023 AMI as its free tier which has support for 5 years from Amazon.
Then choose the Instance type which is the combination of compute, memory and networking resources that is needed for your server. As currently for a demo, we are using the t2.micro which is eligible for the free tier account.
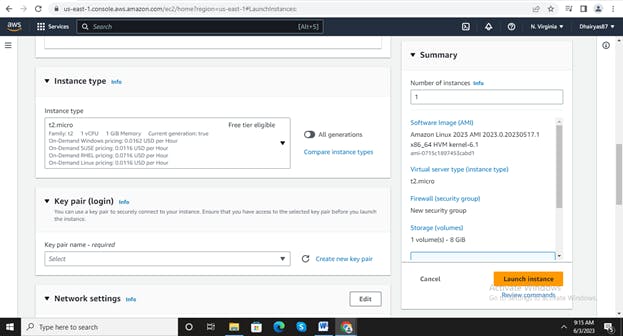
As you would be creating an instance first, you need to create key pair which is used to connect to your Amazon Instance from your local machine via SSH connection. Save the downloaded key pair in your local machine. This would be used to establish a connection via putty.

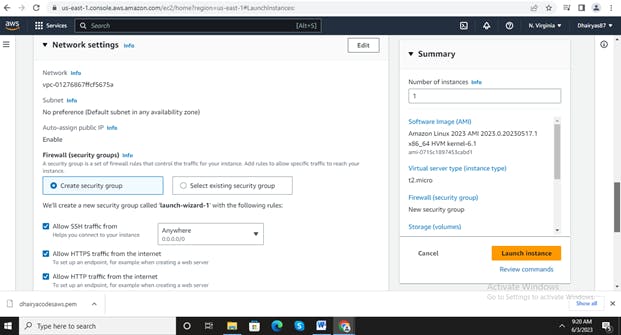
Choose the network connectivity you want to allow for this EC2 instance. Connectivity from where this instance is accessible .
Configure the storage that you require for your Virtual Server. As this is a free tier you would be eligible for 30GB of free storage. We would be selecting 8 GB.
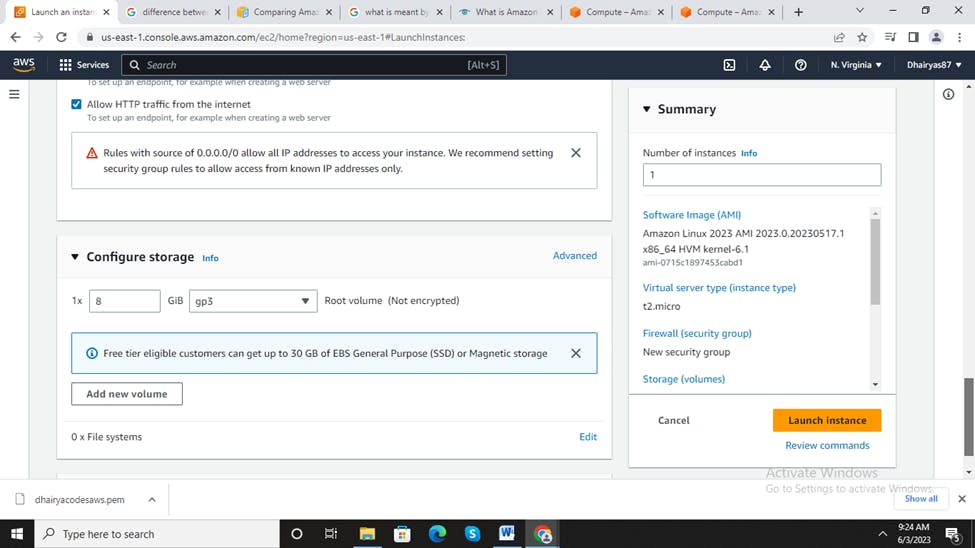
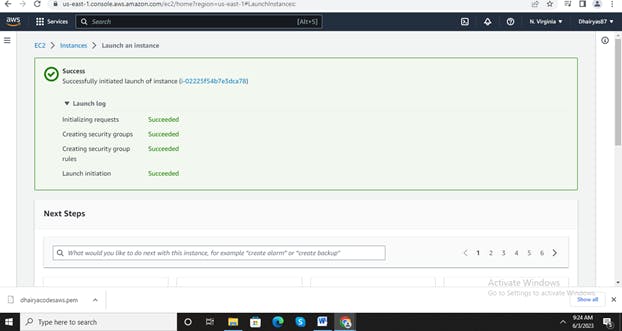
Finally, Click on launch instance and your EC2 instance would be launched
.